Tutorial no .5
In this tutorial we are going to create a wedding photo frame using basic photoshop halftone effect.
Step 1:- Select a background image prefer the image that contains bridal image. For reference you can use the image that is provided below
Step:2 create a new blank layer above this background layer. Fill this blank layer with white color. Select the white color from color palette after filling and layer with white color the layer will look like this.
Step 3:- After applying fill tool the image will look like below
Step 4:- select the marque tool (rectangular tool). Draw a rectangle over the white surface and leave some space. This space will add effect more the space more will be halftone effect.
Step5:-select the black colour from the Color palette. Fill the inner layer with the black colour.the image will look like this.
Step 6:- Right click on the layer 1 and select convert to smart object. This will make the layer as object to apply effect on it
Step7:- Go to filter-> apply Gaussian Blur filter with the value of 18. After applying the layer with blur filter. Image look like this.
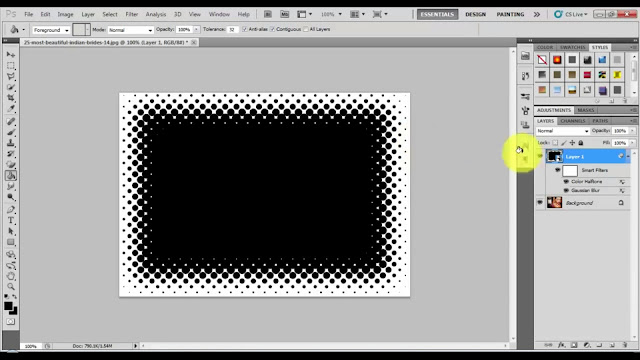
Step8:- Go to filter -> pixelated->color halftone.
Fill these values
Radius :- 12
Chanel 1:- 45
Chanel 2:- 45
Chanel 3:- 45
Chanel 4:- 45
After applying correct values to the filter. The image will be like this.
Step 9:- Now go to layer and apply screen on it this will reveal the background image over the black area of the layer 1. Finally your image look like this .
Step 10:- create a new text layer above all of the layers. Type happily married over this and select any bright color to suits the effect.
Thank you for reading
You can watch YouTube video in the link which is provided below .


No comments:
Post a Comment